Game > Smart Downloader > Plugin Guide
Smart Downloader Jenkins Plugin
You can conveniently use the new build upload feature of NHN Cloud Smart Downloader through the Smart Downloader Jenkins Plugin.
Installing the Plugin
Minimum Version Requirements for Jenkins
Jenkins 2.145.1 or later version is required. The plugin function is not supported in the previous version of Jenkins, so you need to check the version before using the plugin.
1. Download Jenkins Plugin
Download the smartdl-uploader.hpi file from the following link. Download: smartdl-uploader.hpi
2. Install
Go to [Jenkins] > [Manage Jenkins] > [Manage Plugins] > [Advanced Tab] > [Upload Plugin], and select and upload the smartdl-uploader.hpi file downloaded in 1. Download Jenkins Plugin.
When it is properly installed, the installation can be found on the List of Installed Plugins tab as in the [Figure 1] below.

Using the Plugin
Prerequisites
To use Smart Downloader Jenkins Plugin, NHN Cloud API Security Setting is required.
NHN Cloud API Security Setting: https://console.toast.com/securitySetting
1. Set Authentication
From [Jenkins] > [Credentials] > [System], select Global Credentials and go to Add Credentials to add NHN Cloud Credentials. Select NHN Cloud Credentials for Kind like [Figure 2] as below, and enter NHN Cloud User ID, NHN Cloud AccessKeyID, and NHN Cloud SecretKey.
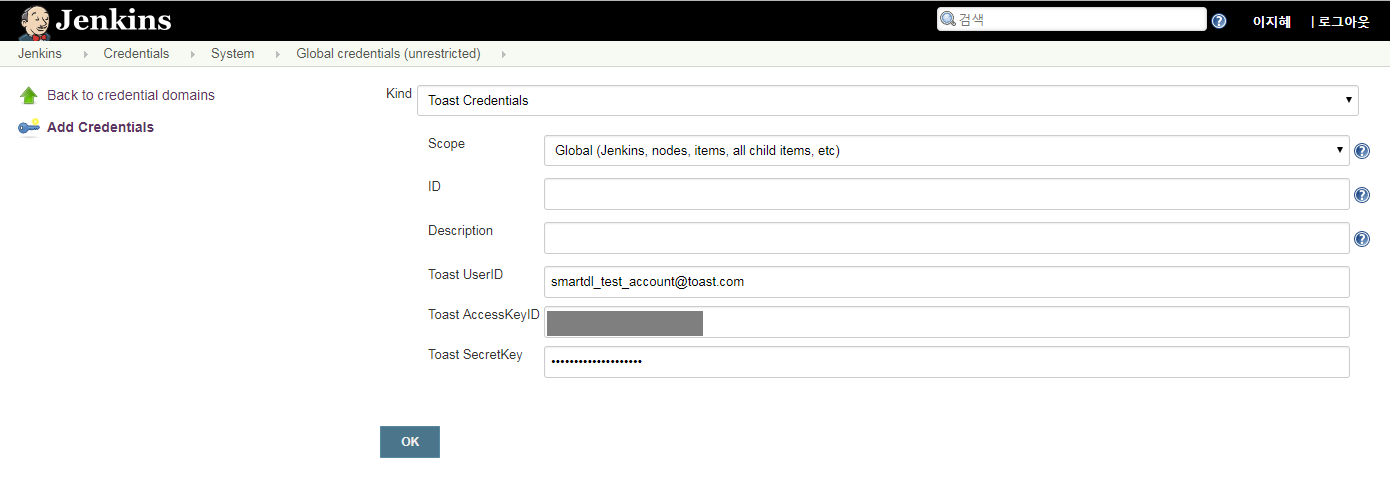
- Scope [Required]: Select Global
- ID: Credential ID value used within Jenkins. If it is left blank, a unique ID is automatically created.
- Description: Enter description for NHN Cloud authentication.
- NHN Cloud UserID [Required]: Account for NHN Cloud access
- NHN Cloud AccessKeyID [Required]: AccessKeyID issued from the NHN Cloud API Security Setting menu
- NHN Cloud SecretKey [Required]: SecretKey issued from the NHN Cloud API Security Setting menu
Note: Fields marked as [Required] are required input values. If the corresponding value is not entered, the plugin will not run normally.
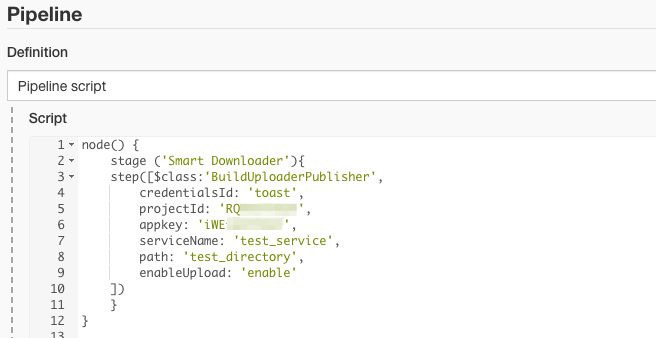
2. Configure the Project
Go to [Jenkins] > Select a project > [Configuration] > [Post-build Actions], and add SmartDL Uploader.
Enter setting values as in [Figure 3].
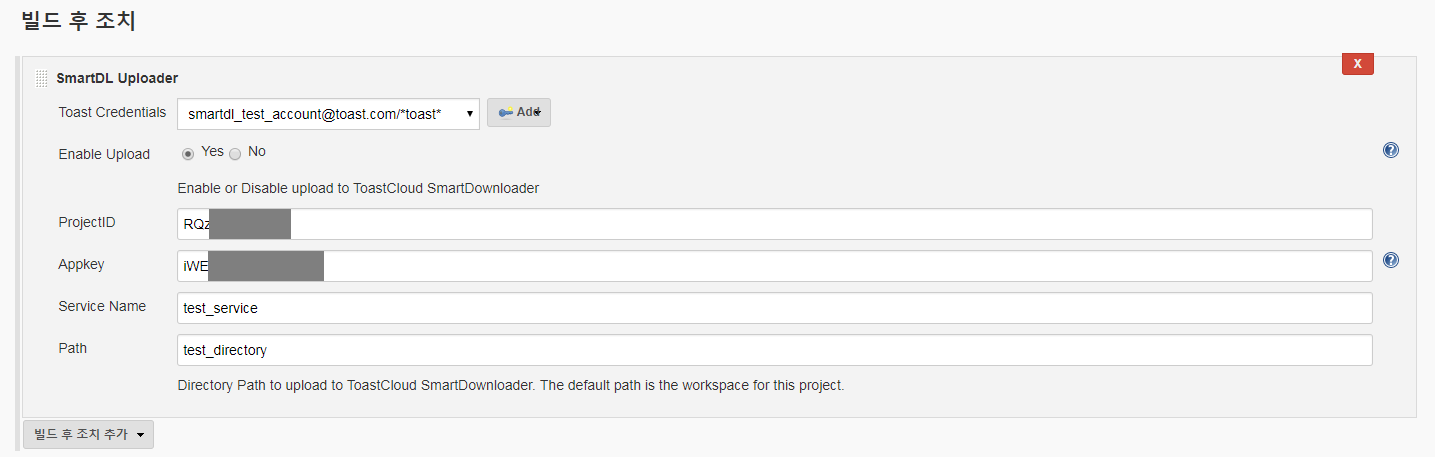
- NHN Cloud Credentials [Required]: Select the NHN Cloud Credential added from 1. Set Authentication. If an invalid authentication key is entered, authentication fails and Plugin cannot be enabled.
- Enable Upload [Required]: This option determines whether Plugin operations are enabled or disabled. Plugin operations may be disabled while maintaining the status where plugin settings are stored.
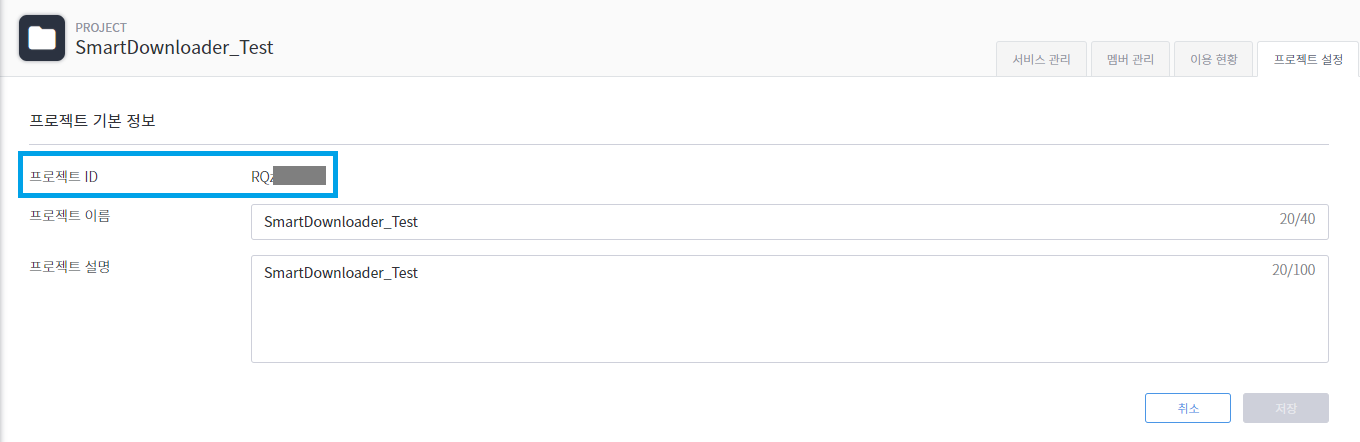
- ProjectID [Required]: NHN Cloud Project ID for Smart Downloader. It is available in the NHN Cloud Console Project Setting, like in [Figure 4] as below.
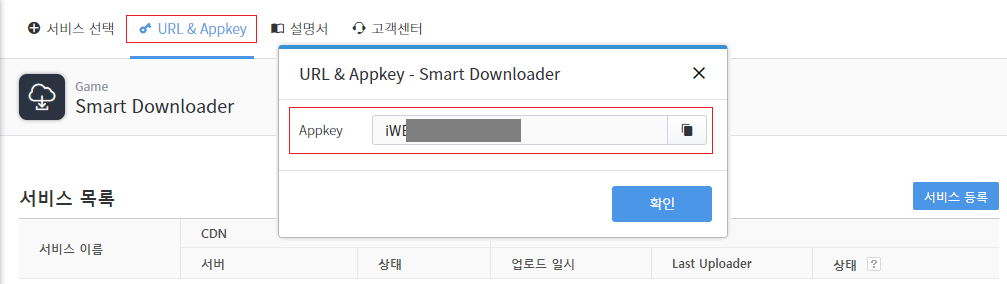
- Appkey [Required]: Smart Downloader Appkey. It is available on the URL & Appkey page in the NHN Cloud Smart Downloader Console, like in [Figure 5] as below.
- Service Name [Required]: Enter the name of Smart Downloader service to process new build uploads.
- Path [Required]: Enter the path of the folder to upload. Only folder upload is supported, and single file upload is not supported. The folder should be located under the workspace folder within Jenkins.
Note: Fields marked as [Required] are required input values. If the corresponding value is not entered, the plugin will not run normally.
Notes for uploading - Files automatically created by the OS (such as .DS_Store, desktop.ini, thumbs.db) are excluded when uploading. - When uploading, the maximum size is limited to 5GB.
3. Check the Result
After a project build, Plugin execution results can be found through logs. In case of success, you can check the details of the files uploaded successfully, the total number of uploaded files, the total size, the completion time, and the consumed time. If you check the real-time log during upload, you can check the progress more easily because the log remains in real time so that you can check the information of the file being uploaded.
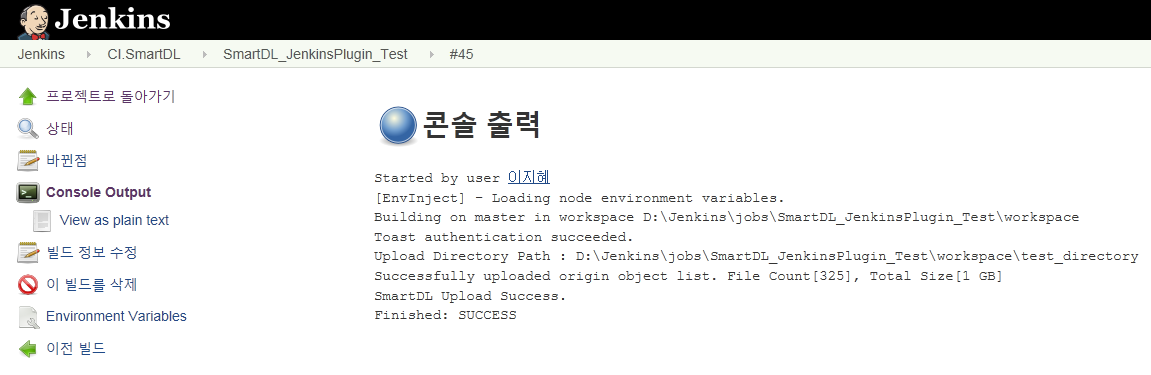
Build upload history is also available on the Service Details page in the Smart Downloader console.
When uploading a build through the plugin, the NHN Cloud UserID registered in the plugin is displayed in Last Uploader.

If the plugin execution result is failure, refer to the error message in the console log and contact the owner.
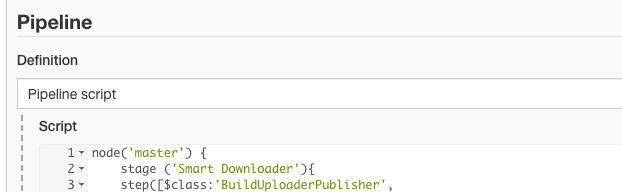
Pipeline Configuration
Perform installation and configuration of Smart Downloader Plugin in the same way as above, but proceed with the Pipeline configuration instead of 'Post-build Actions' configuration described in [2. Configure the Project (see Figure 3)]. Go to [Jenkins] > Select a project > [Configuration] > [Pipeline], and add the script below at the end.
node() {
    stage ('Smart Downloader'){
    step([$class:'BuildUploaderPublisher',
        credentialsId: '<NHN Cloud Credentials>',
        projectId: '<NHN Cloud Project ID>',
        appkey: '<Smart Downloader Appkey>',
        serviceName: '<Smart Downloader service name>',
        path: '<path of folder to upload>',
        enableUpload: 'enable'
    ])
    }
}
For detailed setting values of items, refer to [Figure 3] and description of [2. Configure the Project] above.
Note
When configuring and using master/slave nodes in Jenkins, make sure you set the node information.

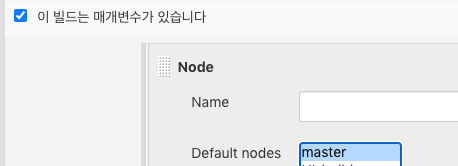
- We recommend you set the Node configuration according to the configuration of each project.